A Beginner's Guide to Ableton Live

By Pat Cupo
What is this thing called Ableton Live? Maybe you've heard others rave about it. Maybe you've received a free demo disc with some other product that you've purchased. Or maybe you're a seasoned pro when it comes to digital audio workstations (DAW ... but you already knew that acronym, didn't you?) and are skeptical about making music with a program that's built for live performance. Allow me–Patrick Cupo, a veteran music instructor and Ableton Live expert–to guide you through Live's interface, teach you how to think about the program, and show you the best way to get started using Live today.
But First, Download the Free Demo!
First things first, you need Live installed on your computer. Follow this link to Ableton's website for your free 30-day trial of Live 9 Suite (follow the directions carefully): https://www.ableton.com/en/trial/
Free demos come in all shapes and sizes, but Live's is the best kind. With Live Suite, you get complete access to the full set of instruments and effects for 30 days–I advise using the program as much as possible during this time. Once your trial is up, you'll still have the same access but you won't be able to save your work or export anything from Live. So when you're ready, install the demo, press play and have fun making shapes.
Getting to Know the Lay of the Land
You're probably eager to get started, but at this point you need to be able to point at stuff and say, "Oh, yeah, that's the Session View. It does this ..." Open up Live and start using the keyboard shortcuts I've provided below to show/hide different parts of the interface. Note: I've included Mac and PC shortcuts.
Info View (Cmd/Cntrl+?): This little guy will be your best friend when you're first learning Live. Open it, hover your mouse's cursor over a part of Live you want to know more about, and information pertaining to that thing will show up. I still use it to this day.
Arrangement View (Tab): One of the two main view's in Live, this is where you'll build the final arrangement of your song/piece/track. You could spend all of your time here or you can choose to split it between here and the Session View.
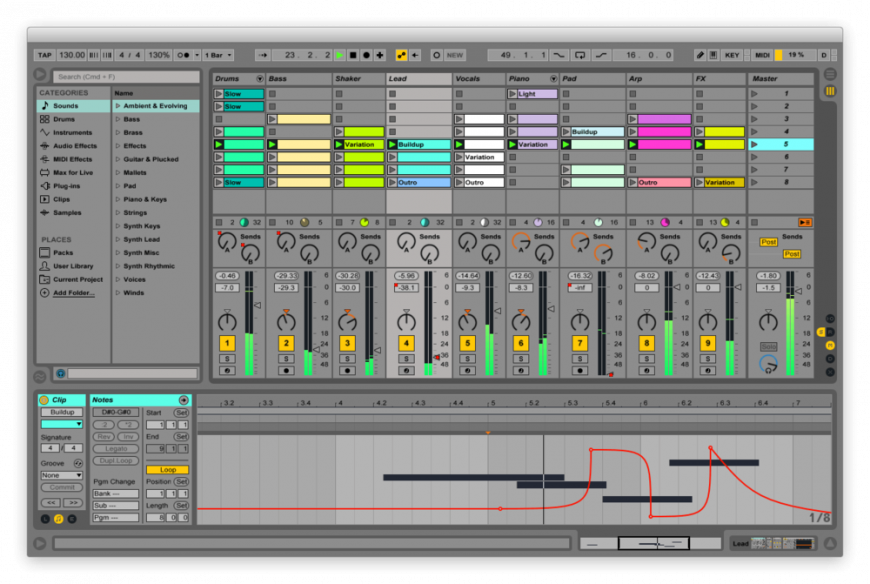
Session View (Tab): The other main view of Live. If the Arrangement is the linear view of time (from start to finish), then Session is the non-linear view of time. This is where you gather, or even create, all of your musical ideas.
Browser (Cmd/Cntrl+Opt/Alt+b): Eventually, you'll be looking for some instruments, effects, and loops to start making music. You should check out the Browser–it's all there.
Help View (Menu > Help > Help View): Need help? Check out the Help View for tutorial and much more. You should probably check this out even if you think you don't need help.
Clip View (Shift+Tab): Whether you're in the Arrangement View or Session View, you'll store your musical ideas in things called Clips. The Clip View allows you to create, view, and edit those ideas.
Track View (Shift+Tab): If you end up using Live's instruments and effects to build your tracks, you can view and tweak them in the Track View.
Mixer (Cmd/Cntrl+Opt/Alt+m): It's very important to get all of the parts of your song to work together, and not just on the compositional level. The Mixer will let you adjust the volume, panning, etc. of each track. It's also where the record buttons are–you'll need them.
A Few Good Ableton Live Analogies
Now, what is Ableton Live? In a nutshell, it's a platform for creating and performing music. But with that said, there are a couple of ways to think about Live that are widely accepted:
The Tape Player Analogy: [PLAY] The Arrangement View is your tape player. When you press play, time goes from start to finish. Working with this mindset really helps you learn to think in "musical time", learn about the art of arranging, and learn to finish tracks. [STOP]
The Room Full of iPods: Imagine a room with hundreds of iPods, each of them can only play one piece of music. Feel free to press play on any of them at any time and those clips of music will loop. Interesting, right? That is what the Session View is like. This is the place where you create and improvise freely, so feel free.
The Studio Recording Session: The magic comes when you learn to record from Session View to Arrangement View. This is just like a studio recording session: a bunch of musicians get in a live recording room and riff on some musical ideas; they'll bounce these ideas off of each other until something works; when things gel together, the recording engineer will press record and capture the performance on tape. So the musicians in the live room is like the Session View and the engineers/producers in the booth is like the Arrangement View.
How to Get Started
Learn Ableton Live with Pat Cupo in a two week intensive class starting July 13th, 2015. Learn more & enroll >>> |
Ready to get started? All you have to do is go to the Help View (I told you that you'd need it ... Menu > Help > Help View) and try out the built-in Live Lessons. Some lessons are more advanced than others, but don't be affraid to try anything out. If you do these lessons and incorporate the concepts into your own music, you'll be up and running with Live in no time. Enjoy!