Setting the Scene for Your Online Classroom
Make sure you set the scene prior to the lesson. This includes checking that your lighting is okay and the on-screen view shows everything you want to be seen and nothing that you don't want. You 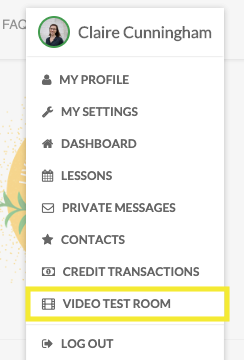 can always pop into your test room to make sure everything looks good that is on-camera -- find the test room under the circular icon on the upper right side of the screen (you have to be logged into Lessonface as a teacher or student to get this, registration for either type of account is totally free and takes about 1 minute.)
Lighting: Reasonably good lighting can be achieved with daylighting, or with an overhead and lamp combination. Using only an overhead light at night or being really close to a bright window may not give great results. The overhead light will likely make shadows, making you look gaunt and making fingering or other intricate skills difficult to view. Being close to a bright window causes glare, making you overly bright and washed out - which also makes it difficult for your student to see what you're doing. Do not rely on your computer as a sole source of light! It's not enough light and will also cast a blue glow on everything. Make sure there is a source of light in front of you, rather than only behind you, or you may appear back-lit.
Setting the Scene:
Make sure that you don't have anything on camera that your student shouldn't see. We had a teacher lose a student over this very matter -- literal dirty laundry. It just doesn't look good. Try to clear away the clutter that would be visible over video conference. A plain wall background is perfectly great for a lesson.
We've seen many teachers take this to the next level, with fully set tableaus behind them on their video conferences. This can look really great, too, and help the student to realize from the first moment the thought you're putting into your lessons.
You want to make sure you set up your computer or tablet so that at the least the part of the instrument you're moving your hands on is visible. This may sound silly, but we've had to tell people a few times - remember that you can always move yourself further away from the webcam if it's a handheld instrument. For larger instruments - piano, marimba, harp - getting all the action on screen is completely feasible, just use a sturdy table or chair and adjust the camera angle so that the entire area in action is viewable. And you can always continue to adjust the angles as needed during the lesson.
Having a space that's quiet, where you will be alone, and can focus is also key. If there are others in your space tell them how long you need for the lesson, and ask them for their help in being quiet for the duration (or to go to another room, ideally).
It's a good idea to have whatever supplies you'll need within close reach before the lesson begins -- a glass of water, a notebook, your tuner.
What to Wear: People like to joke that one doesn't need to be fully dressed for video conferencing. We don't recommend that approach. You may need to get up to grab a book from a bookshelf, or your tuner, or to answer an unexpected knock at the door. It's good to be comfortable, at ease, and fully attired.
Go to the next section, Differences in Communicating with Online Lessons.