Guitar 101 for Parents of New Guitarists
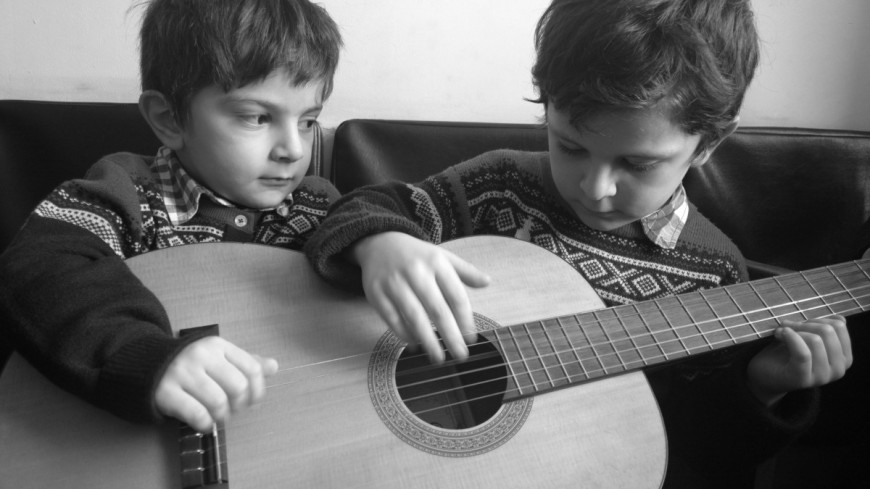

Do you have a young child who just can't wait to start online guitar lessons this fall? Students age five to seven need more parental involvement than most, especially at the beginning. Learn these fundamentals so that you can help your child start off right.
| Part 2 of the series: Encouraging Your Young Guitarist Part 3 of the series: Encouraging Your Teen Guitarist |
Purchasing a guitar
Go to your local music shop and purchase a half-size or three-quarter size guitar with nylon (not steel) strings. Bring your child along and have them sit with the guitar. His or her left hand needs to comfortably reach all frets. The right arm needs to be able to rest over the body of the guitar to allow the right hand fingers to naturally reach all the strings.
Don't buy a $30 guitar that comes in a cardboard case from your local big box store. These guitars may be colorful and cute, but functionally they are only toys. They are difficult to tune, uncomfortable to play, and nearly impossible to learn on.
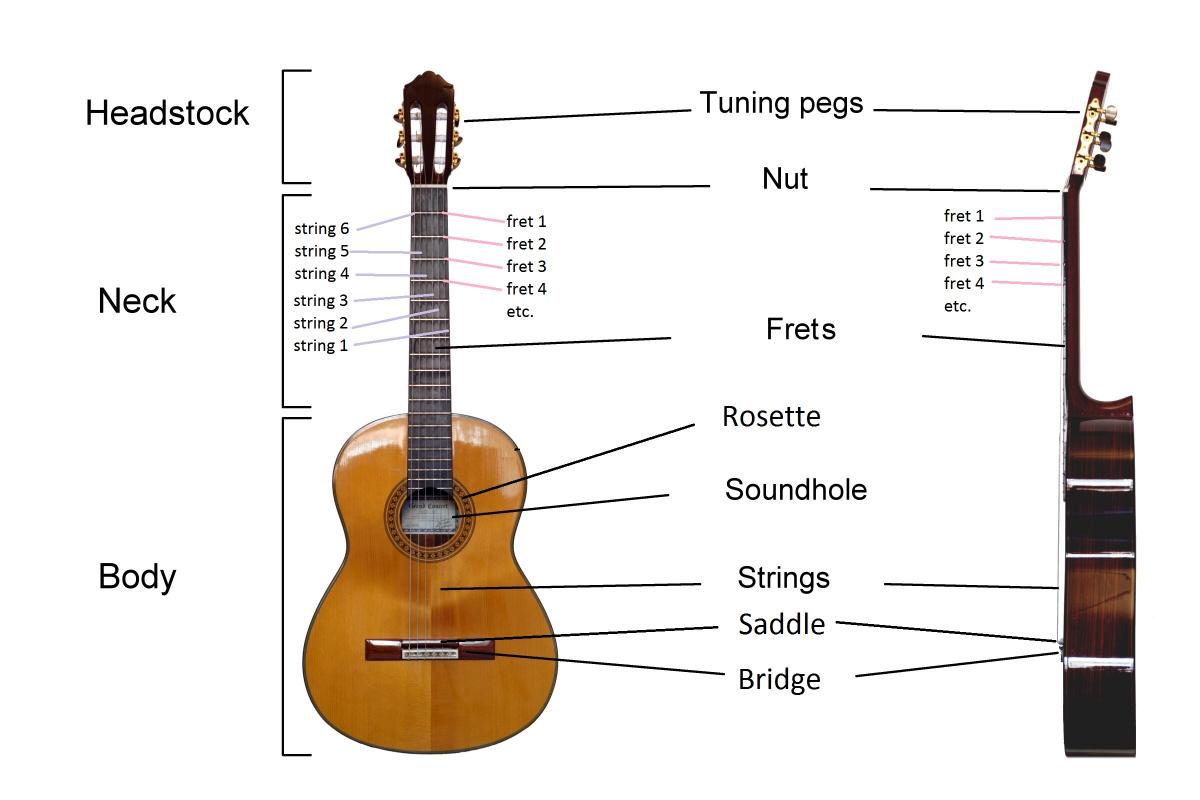
Basic Guitar Anatomy
Learn the important parts of the guitar so you can help your child and communicate effectively with your child's teacher.
Guitar Tuning
All guitars need to be tuned often – it's perfectly normal! The wood of the guitar responds to changes in temperature and humidity, and the strings loosen and stretch and sound lower (flat) or higher (sharp) than they should. Tuning can be frustrating for young children and takes up lesson time if you leave it for the teacher. So get a clip-on electric tuner for the guitar or download an app for your smartphone. Plan on tuning the guitar before each weekly lesson, and any time when it doesn't sound quite right.
Here's what you need to know:
- Each string has a pitch (or note) that it needs to sound.
- String 1 = E
- String 2 = B
- String 3 = G
- String 4 = D
- String 5 = A
- String 6 = E
- Each tuning peg corresponds to a particular string. Follow the string to its origen on the headstock to know which peg to turn. Turning the peg counterclockwise tightens the string and makes it sound higher. Turning the peg clockwise loosens the string and makes it sound lower.
- An electronic tuner shows you that a note is in tune when the needle is in the center. The tuner may light up or change color when it's right on the mark. If the needle falls to the left of the note, it is too low, or 'flat'. Tighten the string until the needle rises to the center. If the needle falls to the right of the note, it is too high, or 'sharp'. Loosen the string until the needle falls to the center.
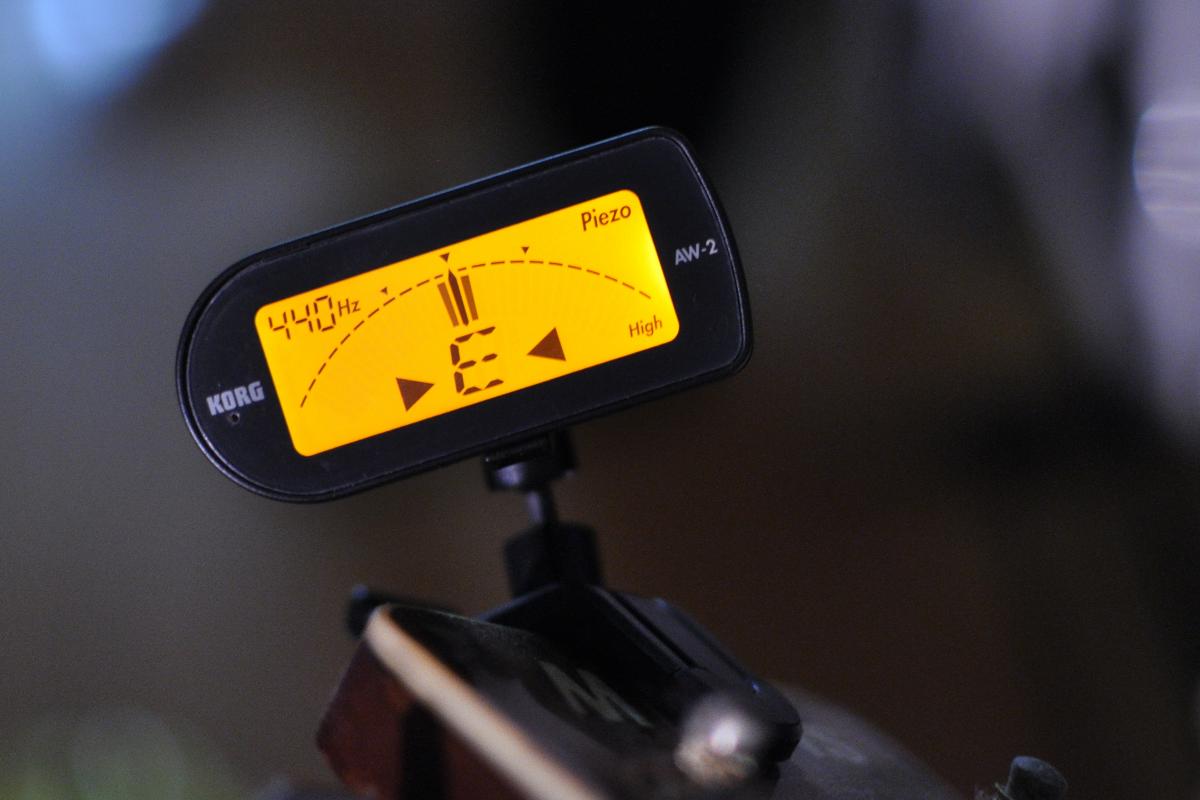
- If a string is extremely out of tune, it may register as a different note to the tuner. For example, if the first string is way too low, it may read 'D' instead of 'E'. That means you need to turn the peg quite a bit until the note says 'E', and then tighten the string more slowly until the needle arrives in the center. Brand new guitars and recently restrung guitars are often extremely out of tune.
- The musical alphabet (below) goes from A to G and then starts over. Use it to help you know which way to turn the strings if the tuner reads a note The pairs of notes with the sharp symbol (#) and flat symbol (b) are effectively the same (for tuning purposes), and fall in between two 'normal' notes.
- A – A#/Bb – B – C – C#/Db – D – D#/Eb – E – F – F#/Gb – G – G#/Ab – A – A#/Bb – etc.

Be present and attentive in the first several lessons
Consider yourself your child's classmate for the first month. Learn how your child should hold the guitar and how to use the left hand fingertips to press down on the frets. Learn your way around the staff and the basics of written music. Learn the notes on the first string and the first couple of songs from the child's book. Understanding just these few fundamentals will be a huge help to your child during the beginning stages.
After the first month of lessons, you should still plan on being in the same room as your child, but you don't need to pay close attention the whole time. Just be available to help with potential technical and communication issues. Also plan on touching base at the end of each class, so that you can get a re-cap of the lesson and an overview of the week's practice objectives.
Take charge of practice time
I recommend this for all parents of children younger than ten years. Don't expect your child to take initiative in practice time. Even the most enthusiastic students during lessons tend to forget they own the instrument between classes. It doesn't mean that they don't love music. Rather, learning an instrument can be hard work, and patience and discipline rarely come naturally to young children. The habit of regular practice must be cultivated carefully by you and the child's teacher. Ask your child's teacher how long and often they should practice, and make sure you understand the weekly objectives that your teacher should outline at the end of each class. Communicate often with the teacher about how practice goes between lessons, especially when your child runs into difficulties.
With this advice in mind, you'll ensure good communication with your child's teacher and solid musical beginning for your child.
Go to part 2 of the series: Encouraging Your Young Guitarist | Jump to part 3 of the series: Encouraging Your Teen Guitarist
 |
Leah Kruszewski has been a guitar teacher for nearly ten years, specializing in acoustic, classical, flamenco, and fingerstyle guitar. Learn more about online lessons with Leah. |
Find more Guitar Classes and Tutorials

Start Lessons
Search for your perfect music, language, or arts teacher and start working towards your learning goals.

Start with a Free Trial
Teachers on Lessonface set their own rates and discounts. Participating teachers offer free trials.
Great Teachers, Great Lessons, Guaranteed
Learn more about the greatest universe for online music and arts lessons.

Lessonface Recitals, Open Mics, Masterclasses, and Jams
Welcome students of all ages and skill levels!